Wednesday, August 28, 2013

Cornish Game Hen Alfredo


Smoked Chicken Alfredo


Sometimes, even when good intentions go astray, things can still end up ok in the end. That happened to me about a year ago. I was telling myself that I should be a little more healthy in my dinner choices. In an effort to achieve that, I purchased a rock cornish game hen to have for dinner with rice and vegetables. 

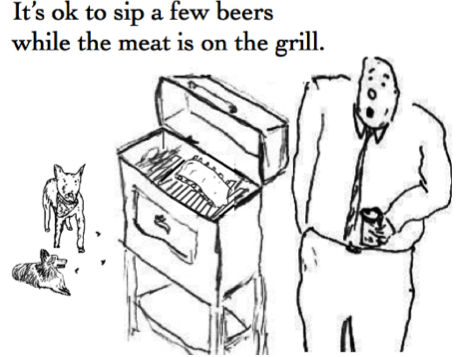
I came home that Friday and lit my grill. When the coals were ready, I put the game hen on the grill to let it cook gently in the smokey indirect heat.

So far so good, right? Then my neighbor stopped over to have a beer with me. Well, one beer turned into several and we snacked on salted-in-the-shell peanuts. By the time he left, the game hen was roasted to perfection. The problem was, I was no longer hungry. After the beer and peanuts, I didn't want dinner. I ended up putting the hen in the refrigerator and called it an early night.

The next day, I had a group coming over for dinner, so I turned the smokey game hen into a pasta dish. By all accounts, everyone liked it. Heavy cream, butter and cheese, that’s healthy right?

1 cornish hen
Cajun seasoning
Water
1 large onion, cut in half
1 stick of butter
2 shallots sliced razor thin
A pinch of red pepper flakes
1 tbs. flour
1 pint of heavy cream
1-1/2 cups grated Parmigiano Reggiano
Nutmeg for grating
1 lb. of bow tie pasta, cooked and drained

Preparation

The day before making the pasta (or earlier the same day) light a charcoal grill and season the hen heavily with cajun seasoning. Roast it over indirect heat for about an hour or so. Chill it overnight or just move to the next step.

Place the smokey hen in a sauce pan and cover it with water. Add the onion and simmer it for a couple of hours, very gently. Drain the broth into a bowl and reserve it. Allow the hen to cool. Use a knife and fork and separate all the meat, chop it and place it in a bow. Discard the bones.

Heat a large skillet and melt the butter. Add the shallots and the red pepper flakes and cook gently until the shallots soften and clarify, about a minute. Add the meat from the hen and stir.  Sauté gently for about five minutes.

Sprinkle the meat with the flour and stir for about a minute. Add about a cup of the reserved broth. Stir and allow it to simmer for about a minute. Add the cream and bring to a simmer, stirring often. If needed you can add a little more of the broth. Now add the grated Parmigiano Reggiano and stir. 

The sauce should thicken nicely. Bring it to a simmer, stir and turn off the heat. Grate a little nutmeg over the sauce. Toss with the pasta and serve immediately.

Serving

This Alfredo will go well with pork chops broiled in white wine, sautéed spinach, cheese pizza and a crisp salad. Don’t forget the homemade bread too. For wine, a Californian Merlot will be tasty. Have an extra glass of wine to toast your healthy eating!

Tuesday, August 27, 2013

Chicken Braised in Tomato Sauce


Chicken Braised in Tomato Sauce

Do you ever make pasta sauce with chicken? I do, but then again, I make pasta sauce out of just about anything. 

I remember a couple of years ago, I bought a leg of goat to roast for Easter weekend. It was delicious. I roasted it perfectly medium rare and served it with mashed potatoes and gravy. Some of the left overs were used to make a pasta sauce which was also good.

I’ve also made pasta sauce out of rabbit, duck, shrimp, veal and even chicken livers. So making pasta sauce out of chicken is no biggie for me. If you haven’t tried it, here’s a recipe you can start with.


olive oil
4 skinless, chicken thighs
Cajun seasoning
3 shallots - minced
3 garlic cloves - minced
1 onion - chopped
1 bell pepper - chopped
1 tsp thyme
1 tsp basil
Fresh ground white pepper
1/2 cup dry white wine
1 can peeled tomatoes - 28 oz. 
tabasco - to taste

Preparation

Heat a large braising pan until it is hot. Add olive oil to coat the bottom. Sprinkle the chicken on both sides with the cajun seasoning. Sear the chicken in the hot oil for about four minutes per side. When you turn the chicken over, add the shallots, onions, garlic and bell pepper. When the vegetables start to soften add the thyme and basil and several grindings of white pepper.

Add the white wine and bring it to a simmer. Allow it to cook for a minute or two and then add the can tomatoes. Break the tomatoes up. Cover with a tight fitting lid and allow every thing to simmer gently for at least an hour. Stir every once in a while.

Add some chopped fresh basil if you have any and plenty of tabasco. Taste for salt, pepper and sugar and adjust if necessary. Simmer for 2 minutes  and remove from heat..

Serving

To serve this, place the chicken on the plate next to a big pile of linguine. Cover both with the sauce. Hit it all with a blizzard of fresh grated parmesan cheese. Next add is some stuffed eggplant, fresh baked bread a salad and a good Chianti.

Sunday, August 25, 2013

My Neighbor's Barbecued Ribs

My Neighbor's Barbecued Ribs

For years I have heard about my neighbor making the best ribs around. Still, even knowing that, I was blown away the first time I tasted them. They were full of flavor. Often the bones would fall out when you picked them up. They were tender and the best I’ve ever had. This isn’t his recipe, but it is as close as I can get from spying on him when he cooks. He doesn’t know, but I’m taking notes when I see him at the grill.

Now my neighbor is equipped for the job. He has a Weber kettle grill that is about five feet in diameter.  He can stack five full slabs of ribs on one side, and have the charcoal on the other side of the grill. It is a sight to see. While that is nice, a normal Weber kettle or any other full sized grill will do as long as you watch your heat so it doesn’t get too hot.

My neighbor likes to get the full pork slabs, Flintstone ribs, as he calls them. If you are in the Chicago area, he gets his at Peoria Meats, near downtown. If you can’t get these, slabs of baby back ribs will work well. Don’t worry about cooking time, the ribs will tell you when they are ready for sauce. Oh, one more thing, never, NEVER par boil your ribs! If you want them done right, there are no short cuts. It is an all day process.


At least two slabs of pork ribs
(or three slabs of baby backs)
Cajun seasoning
White pepper
Onion powder
Garlic powder
Paprika
Norman’s Barbecue Sauce

Preparation

At least one day ahead, preferably two, mix your dry rub as follows: 3 parts cajun seasoning, two parts onion powder and one part each of the following: white pepper, garlic powder and the paprika. Since I don’t know how many slabs you are cooking, I can’t tell you how much. For a start, make one part equal to a tablespoon. Mix the seasoning mix and rub it on all sides of the ribs until all surfaces are seasoned. Refrigerate for one or two days.

Start your charcoal grill with a pile of charcoal far on one side of the grill. If you want, add a branch of hardwood as the far border of the charcoal, to provide extra smoke. Pile a bunch of dry sticks and twigs on top of the charcoal and use a torch to light them. (I don’t believe in charcoal starter fluid. I want my charcoal to taste like charcoal.) The sticks will burn down and light the coals.

When the coals are starting to get hot (they don’t have to be fully white) place the ribs, stacked, one on top of the other, on the far side of the grill. If you are using baby back ribs, you can stack three slabs in one stack. The upper slabs will baste the lower slabs. Cover the grill. As long as the meat is not over the coals, it is ok for your grill to get hot at first. 

This is going to take about eight hours for full pork slabs and probably six hours for baby back ribs. Once the coals start to diminish, you can maintain a moderate temperature by adding a handful of charcoal every fifteen or twenty minutes. Not too much. After the initial coals cook down, you don’t want this getting any hotter than 300º, around 250º is good. As you add a handful of charcoal every fifteen minutes, you also want to shuffle the ribs. Every other shuffle, turn them over as well. If you have three in a stack, top goes to the bottom, and the other two move up one position. Try to drip the juices from one slab on to another one to conserve the flavor.

Continue shuffling and adding charcoal until the slabs start falling apart as you shuffle them. If a bone falls out, you know you are getting close. Once the ribs are ready, add another handful of charcoal. Spread the ribs out in a single layer (but not over the coals). Spoon a heavy layer of Norman’s Barbecue Sauce (see my August 21st post) over the ribs. Close the cover of the grill for fifteen minutes. Add another handful of charcoal, turn the ribs over and sauce that side as well. Cover the grill for a final fifteen minutes and you’re ready to serve.

Serving


What do you serve with barbecue ribs? You want extra barbecue sauce on the table. What else? How about corn on the cob, homemade potato salad, and pickles are good too. Fresh baked bread and butter and ice cold beer is a must. I would also suggest cherry pie for dessert.

Saturday, August 24, 2013

Norman’s Garlic Bread

Norman’s Garlic Bread

I make a lot of pasta for my housemates these days. Unfortunately, as warm as it is, I haven't been baking bread much. What I have done a few times was use up bread (or brat buns) that are getting a little old by making garlic bread out of them. It prevents waste and goes well with pasta.

Often during my Wednesday night dinner days, I would want something a little different to serve with my spaghetti dinners than just fresh, homemade bread. I would often have a loaf of day-old homemade bread available, and when I did, I’d make a big batch of this garlic bread for everyone to have with their pasta. I always do whatever I can to encourage overeating.


This is so simple that it is silly to even write it down. I love garlic bread so much and it kills me to see someone heating up garlic bread bought at the store. That just isn’t the same. With it’s olive oily garlic bite, this will have you smacking your lips for the rest of the day!


Several slices of homemade bread
(or a good hearth-baked bread 
from an Italian bakery)
Several cloves of garlic, peeled
Your best extra virgin olive oil
Cajun seasoning
Fresh grated parmesan cheese

Preparation

Now the best way to do this is over a charcoal grill. Lay the slices of bread on the grate over the coals and turn them over as they get toasted. If, however, you didn’t need the grill for the rest of the meal, just use the broiler. Same thing, put them on a cookie sheet and turn them over as they toast.

Allow the toasted bread to cool enough to handle. Take a garlic clove and rub the garlic vigorously over the entire surface of one side of the bread and place it on a cookie sheet. Repeat with the remaining pieces. Now douse the garlicky bread with your best olive oil. Be generous, it’s good for you!

Sprinkle each piece with a little cajun seasoning and lots of fresh grated parmesan cheese. Serve the garlic bread immediately, or place it in a warm oven until dinner is served.

Serving

This garlic bread is extra good with a rack of lamb that is served along side spaghetti. With the addition of a garlicky Caesar salad, a bowl of soup and a bottle of Pitite Sirah, you’ll have a great meal. 


If you are worried about your breath after eating several slices of this garlic bread, I am told that the Italians often eat an expresso coffee bean to cut the garlic from their breath. I’ve tried it, but I’m not sure how well it works. You see, no one has volunteered to kiss me afterwards, so I just don’t know for sure.

Thursday, August 22, 2013

Norman’s Guacamole


Norman’s Guacamole 


Now that my garden is producing tomatoes again, I have the luxury of using garden tomatoes in a lot of recipes. Of course, there's nothing better than just eating them sliced, with sea salt, white pepper, extra virgin olive oil and chopped fresh basil! I can eat that until I'm stuffed. A nice ripe tomato is also good in my guacamole. I'm stopping to pick up a couple of avocados tonight on the way home.

The older I get, the more avocados I seem to eat. I love putting one in my salad. I find a whole avocado per serving is good! I also like them with my fajitas. The one sure fire way to cause my will power to go out the window is to serve me this guacamole! Once I start eating this, I can’t stop.

It seems every time I make this, I never make enough. It is delicious with good tortilla chips. It is great added to burgers. I always add it to fajitas. Usually, however, I end up eating almost the whole batch with chips in one sitting.

One secret that I learned from a loyal reader, was to add the avocado pits to the guacamole, which keeps it from discoloring. I don’t know why that is, but it seems to work. At least, I think it does. I usually never have guacamole around long enough for it to discolor.

2 avocados
1 tomato, chopped
1 medium onion, chopped fine.
1 clove garlic, smashed and minced fine
1 tbs. extra good olive oil
Juice from 2 limes
1/2 tsp. salt
1/4 tsp. cayenne
Fresh ground black pepper

Preparation

Mash the two avocados in a bowl and add the avocado pits. Using a fork, blend in the tomato, onion, garlic, olive oil, lime juice, salt, pepper and cayenne. If you like it, add some chopped cilantro as well. Taste it and adjust it for salt and pepper. Go ahead and add some more cayenne, why not.

Cover and let the guacamole sit at room temperature for at least 15 minutes, then chill. Now the hard part. Try not to eat it all before your guests arrive. 

Serving

Place a large bowl of tortilla chips next to the guacamole and have at it. If you have any left, you can serve it with grilled marinated chicken breasts, grilled zucchini and spanish rice.

Rumor has it that this goes well with ice cold Corona, but I wouldn’t know. Ok, maybe I would know. How I know is not important.

Wednesday, August 21, 2013

Norman’s Barbecue Sauce


Norman’s Barbecue Sauce

After the Great Lisle Flood of 2013, I was surprised to see that both of my grills survived undamaged. Dirty, but undamaged. They were completely under water for two days until the flood waters receded. 

My two grills before they disappeared under water.

It took a lot of cleaning and I bought a couple of grates for them, but I was very pleased that they survived. I do a lot of cooking on them all year round.

When you grill, what kind of person are you, gas or charcoal? I bet you can guess how I’ll answer that question. I have two grills, one charcoal and the other wood and charcoal. I don’t believe in gas grills. Now don’t get all huffy. I’m not criticizing you if you prefer gas. I just happen to prefer cooking over wood and charcoal.

I like to cook everything from roasts to chops over the coals. I love any kind of barbecue cooked long and slow using indirect heat from a mix of wood and charcoal. Years ago, my ribs used to be a little tough, but recently I’ve been copying my neighbor’s technique, and I’m getting pretty good at that too.

When it comes to barbecue sauce, I use to doctor up store bought brands. Over the years, I’ve been adding more and more to the store bought brands until finally I said “To heck with it!” and made my own. It is easy to make.

1 Stick of butter
4 cloves of garlic, smashed and minced
5 thin red hot pepper sliced razor thin
3/4 cup of sugar
2/3 cup of molasses
1 12 oz. bottle of dark beer
1 tsp. onion powder
1 tsp. dry mustard
2 tbs. vinegar
1 tsp. Slap ya Mama or other cajun seasoning
1 tsp. hot paprika
1 tsp thyme
1 12 oz. bottle chili sauce
2 cups ketchup
1/2 tsp. liquid smoke
1 tbs. Sriracha Chili sauce
1/2 tsp. soy sauce
1/2 tsp. Louisiana Hot Sauce

Preparation

Heat a large sauce pan and melt the butter. Add the garlic and the sliced red peppers and let them cook for a few minutes, but don’t brown the garlic. Add the sugar, molasses, the dark beer, the onion powder, mustard,thyme, cajun season and vinegar. Stir well to mix and bring it to a boil. Reduce the heat and simmer, uncovered, for about twelve minutes, stirring often.

Add the chili sauce, ketchup, liquid smoke, Sriracha, soy sauce and Louisiana Sauce. Return to a boil and simmer, stirring, for five minutes. Cover, remove it from the heat and let it cool.

Serving


When your meat on the grill is cooked to tender perfection, liberally apply the sauce to the top side of the meat. Cover the grill and let it cook for about ten minutes. Turn the meat over and repeat. Serve your barbecue with extra sauce on the table. I would add some potato salad, corn on the cob, dill pickles and an ice cold beer. Ok, maybe more than just one ice cold beer.

Tuesday, August 20, 2013

Pasta with Sweet Corn and Scallions


Pasta with Sweet Corn and Scallions

As I mentioned several times before, I used to host a big dinner for family, neighbors and friends every Wednesday night for over eight years. It would usually be anywhere from eight to twenty people. We'd sit and laugh, tell stories, eat lots of food and drink lots of wine.

One of the hardest things about hosting these dinners was getting a handle on how many people were coming. I tried to get everyone to let me know whether they were going to attend, and most would comply. Some would forget.

I would plan the dinner menu so, if one or two people I didn’t expect showed up, I’d still have enough. Every once in a while, I’d be surprised at the last minute with five or six extra people I didn’t plan on. One evening, when that happened, I was worried I wouldn’t have enough food. I prepared dinner for twelve and there were eighteen waiting to eat.

I quickly scanned my pantry and spied a can of corn. I already had pasta water boiling, so this is what I made to serve along with the four other pastas that I had made. It was done faster than the time it took to cook the pasta. Several people had second helpings of it, so it must have been ok. 

One final caution, don’t leave the butter you cut up, on the counter. I did that and one guest mistook the butter chunks for cheese and ate a piece. The look on her face was amusing!


1 Stick of Butter cut into 8 sections
3 Green onions
1 tsp. white pepper
1 can sweet corn with the liquid
1 lb. corkscrew pasta
1 cup fresh grated parmesan

Preparation

In a skillet, melt the butter. Slice the green onion razor thin, and include equal amounts of the white and the green parts.  Add the onion to the butter along with the white pepper. Stir for a minute and remove from the heat.

Heat another skillet. Heat the corn until it is simmering. Drain the corn, but save the liquid. Cook and drain the pasta and toss it with the butter and onions. Add the corn and about a third of the reserved liquid from the corn. Add the fresh grated parmesan and stir to mix.


Serving

If you don’t have a big group coming over, serve a big pile of this pasta next to broiled salmon. Now add some stir fried broccoli and onions. Next, slice the warm bread to have with butter. Open a chilled bottle of Pinot Grigio and you are all set for dinner.

Monday, August 19, 2013

Norman’s Wednesday Night Spaghetti Sauce


Norman’s Wednesday Night Spaghetti Sauce


For over eight years, I hosted a dinner every Wednesday night for family and friends - anywhere from six to twenty people depending on the week. This sauce, or a variation of it would appear about every third week. Although I never made it exactly the same way, it was always similar. I never tire of this sauce.

The nice thing about this sauce is that it is fast and easy. You have time to start the next entrée  item while the sauce simmers. Once the sauce is done, you can take it off the heat, put a lid on it, and work on the rest of the meal.

1/3 cup olive oil
3 lb. hot Italian sausage, casings removed
1 large onion, chopped fine
6 cloves of garlic, smashed and minced
1/2 cup Italian flat leaf parsley, washed and chopped fine
1 tsp thyme
1 tsp oregano
1/2 tsp allspice
1/4 tsp red pepper flakes
3 cups red wine
1 28 oz can of whole tomatoes
1 28 oz can of ground tomatoes
salt, pepper and sugar

Preparation

Heat a large dutch oven until hot and add the olive oil and the sausage. Use a wooden spoon to break it up as it browns. When the sausage looses its pink color, add the onion, garlic, parsley, thyme, oregano, allspice and red pepper flakes. Continue to cook until the sausage is nicely browned and the onions are sweated down.

Add the wine and the whole tomatoes. Break up the tomatoes with a knife and your wooden spoon and then bring the wine to a boil. Reduce the heat and let the sauce simmer gently for thirty minutes. 

Add the ground tomatoes, stir well and taste to adjust for salt, pepper and sugar. Adjust accordingly and taste to verify every thing is as it should be. Let the sauce simmer gently for another ten minutes, but stir often.

Serving


Take a large plate and put a huge pile of spaghetti on it. Now smother it with the sauce. Serve the spaghetti along with a salad, sausage bread, and a bowl of minestrone soup. Have plenty of fresh ground parmesan in a bowl to pass around the table. Any hearty Italian red wine will do, as long as it is abundant.

Sunday, August 18, 2013

Norman’s Fresh Summer Salsa


Norman’s Fresh Summer Salsa

It is no secret that I like my food spicy hot and anyone who knows me can testify to that. Often I’ll think I have something that is fairly mild, only to have others complain that it is too hot. Generally, I’m not very sympathetic. If I like it, it must be good, right?


Having said that, even I have my limits. I recall a Mexican restaurant that was in the Naperville area back in the 1990’s. The food was pretty good and I went there often. The unique thing about this restaurant was that they put a bottle of a Mexican habanero hot sauce on each table. This sauce wasn’t just hot. It was scalding. If you used more than a drop, you were in trouble. By comparison Tabasco seemed like ketchup.

I used to get the biggest kick out of watching other people use the hot sauce for the first time. They clearly expected the usual hot sauce strength and had no idea what they were in for. 

It would never fail that someone would douse their enchiladas with this sauce and dig in. It would only take about three seconds when the look of panic registered on their faces. Then the contortions would start. They’d drink their beer or margarita in attempt to douse the flames, but it would never help (milk or cream is the only remedy). 

I could never keep from laughing, but the afflicted would never notice. They were only aware of their burning mouth. I could have been a Good Samaritan and warned them, but that would take the fun out of my evening. What can I say, it was terribly funny to watch.

While this salsa is hot, it is nothing like the sauce I was just telling you about. If you are going to be wimpy about it, reduce the amount of sliced cayenne pepper, but if you do, you are a wimp.

3 Cups of chopped ripe tomatoes from the garden
3 Red cayenne peppers, sliced very thin
1 Medium onion, chopped fine
1 Clove of garlic, smashed and minced very fine
1/4 Cup fresh chopped parsley
Fresh ground black pepper and sea salt to taste
1 tbs. extra good olive oil
Juice of two limes

Preparation

Now pay attention, you must follow these directions carefully. Add all the ingredients into a bowl. Stir to mix. Let sit at room temperature for one hour so the flavors can blend. 

Serving

Serve with good tortilla chips from a local manufacturer and an ice cold beer. I would follow that with fajitas and more beer, chips and salsa. For dessert, I’d serve more beer. Keep the salsa handy. You never know, you might need it, depending on how long you keep serving dessert.

Friday, August 16, 2013

Chicken With Garlic and Wine


Rustic Chicken With Garlic and Wine

The Bears have started their preseason, so autumn isn't that far away. It will be different this fall because my housemates are  originally from Wisconsin and therefore they are Packers fans. Sundays may be a little tense when the Bears and Packers play. Maybe a rustic chicken dinner will help. This flavorful French meal is perfect for a fall afternoon.

The key to making this recipe is one of those blueish black roasting pans that are kind of shaped like a football. They are made of steel and are enamel coated with a nice fitting lid. One other advantage is that they are in-expensive as well. If you donʼt have one, go to a K-Mart, or Walmart or any other kind of mart, and get one. Now, don’t argue about it. Just go get one ... Now.

While they are running to Walmart, the rest of us can begin. Let me tell you something. About an hour after you put this in the oven, the house will fill with a heavy smell of garlic and herbs. Donʼt worry, this is a good thing. 

The chicken will cook for three hours. By the time it is ready, the flavors will have blended and mellowed. The chicken and potatoes will have that garlicky French flavor infused into them. When you taste it, you will feel like you just stepped into a bistro in the French countryside. 


Now, donʼt disappoint yourself. This is going to be dinner for two. Make sure that you have an extra bottle of Bordeaux in case you need it. If it wasn’t a special occasion when you sat down at the table, it will be by the time you take your first bite. With a meal like this, why not over indulge on the wine.

Now, donʼt be afraid to eat the garlic cloves with the chicken and potatoes. They are mellow and tasty. I eat them all the time. Eat them, they're good for you.

1 small to medium fryer chicken 
3 celery stalks
1 bulb of garlic - cloves separated and peeled
1 tsp. herbs de provence
Cajun seasoning
1 bottle of dry white wine
olive oil
4 potatoes
Sea salt and fresh ground white pepper

Preparation

Wash the chicken and pat it dry with paper towels. Place a pinch of the herbs de provence in the cavity of the chicken. Rub the chicken with olive oil. Place the chicken in the roasting pan and sprinkle with the remaining herbs and some cajun seasoning. 

Cut the celery stalks in 3 inch lengths and place them around the chicken. Scatter the garlic cloves evenly around the chicken. Peel the potatoes and rub each one with lots of olive oil and then place them around the chicken. Pour a little olive oil over the chicken and then pour the whole bottle of white wine into the roasting pan around the chicken. Season with plenty of salt and white pepper.

Put the lid on the roasting pan and place it in a 300 degree oven. After an hour, lower the temperature to 250 degrees. Roast for a total of three hours. Baste the chicken with some of the liquid every half hour or so.

Serving

Serve a chicken breast and one leg quarter on each plate next to two of the potatoes. Mash the potatoes a little with a fork and spoon some of the liquid from the roasting pan over both the chicken and potatoes. Make sure each plate gets its fair share of the garlic cloves. For goodness sake, make sure all the garlic gets on the plates!

If you are afraid all the garlic cloves won't be eaten, you can take all the liquid, with the garlic and celery, and blend it into a sauce. Then just serve that over the chicken and potatoes.


A salad with a simple vinaigrette dressing, steamed broccoli, a crusty baguette - with extra good olive oil for dipping the bread in - and lots of Bordeaux will round the meal out nicely. Stewed raspberries served over vanilla ice cream would make a nice dessert.

Thursday, August 15, 2013

Norman’s Lamb and Garlic Stuffed Pizza


Norman’s Lamb and Garlic Stuffed Pizza


I live in the Chicago area and as such, I follow a few simple rules. One is never, I mean never, put ketchup on a hotdog! That's almost a felony in the Chicago area. The other is to eat stuffed pizza as often as you can. 

Have you ever tried to make a stuffed pizza? It isn't that difficult. Stuffed pizza is a special treat. Garlic, lamb, tomato sauce and cheese! How bad can it be? You could always leave off the top crust, but why would you want to do that? 

This same pizza can be made with ground beef, ground pork or ground veal. For you health nuts, you could even use ground turkey. I’m sorry, but I like lamb, so that’s what I use. Oh, and don’t get wimpy and leave out the sliced hot peppers. They are good for your digestion.

1 batch of Norman’s Pizza Dough (See today's other post)
1 batch of Norman’s Quick Pizza Sauce
Olive oil
1 lb. of ground lamb
3 large cloves of garlic, smashed and minced
2 small hot peppers sliced razor thin
1/2 cup shredded parmesan cheese
1/2 lb. sliced provolone cheese
1/2 lb. shredded mozzarella cheese

Preparation

Heat a cast iron skillet and add just enough olive oil to coat the bottom. Add the ground lamb and stir. Let it cook until almost cooked through and add the garlic and sliced peppers. Stir until everything is cooked through. Use a slotted spoon to remove to a bowl.

Divide the dough into two parts, one third and two thirds, so you have one big piece and one smaller piece of dough. Work the larger one into a large circle. Place it on a large pizza pan that has been sprinkled with corn meal. 

Ladle some sauce on it, but leave the outer 2” uncovered. Use the slotted spoon to add as much of the ground lamb as you like to the pizza, leaving behind any fat in the bowl. Again, leave the outer 2” of the dough uncovered. Sprinkle on the shredded parmesan and then add a layer of sliced provolone cheese. Now add on some shredded mozzarella.

Work the remaining piece of dough into a thiner large circle. You want this circle to be big enough to cover the covered portion of the pizza and one inch of the uncovered part. Roll up the outer edges of the two crusts together and kind of twist them to seal the pizza. Brush the top crust with olive oil, be generous. Sprinkle the crust with fresh ground white pepper and a little oregano. Make a few slits into the top crust to let the steam out. Bake at 425º until the crust is golden brown. Remove and drizzle more olive oil over the top. Allow it to sit for ten minutes before slicing.

Serving

Here’s how I would serve this. Start with a large caesar salad. You could serve other side dishes too, but I tend to think of large pizzas as single serving portions, so I just go with pizza and salad. Use your judgement. Most people like pizza with beer, but I prefer wine. I’ll open a bottle of Montepulciano DʼAbruzzo. You can do what you want.

Norman’s Pizza Dough (and House Pizza)


Norman’s Pizza Dough (and House Pizza)


It just dawned on me that I still haven't posted a recipe for my pizza dough. My bad. I know some of the pizza recipes have the dough directions, but here's my general, all purpose dough recipe.

Please don’t argue with me. You can’t use store-bought crust for your pizzas. Fresh, homemade pizza dough is so much better and doesn’t take much more time than the store-bought stuff. Once you get in the habit of doing it, you will do it often. I do it at least once every week and most weeks more than that.

Now donʼt go getting goofy trying to measure everything exactly. I donʼt measure any of this stuff. Remember, you are making pizza not mixing rocket fuel.

2-1/2 cups flour 
2 tbs. instant yeast 
1 tsp. sugar 
1 tsp. salt 
3 tbs. olive oil 
water 

Preparation

In your mix master, add the flour, sugar, olive oil, yeast and salt. Add enough water - a little at a time - to form the dough. Now, donʼt flip out on me. If you added too much water just add a little flour to make the dough right (that will teach you to add the water a little at a time). Knead the dough for a few minutes and let it rise for 15 minutes.

In a very large pizza pan sprinkle a little flour. Place the dough in the center of the pan. Using your finger tips on both hands (shape your hands like you have bear claws), poke the dough. Turn the dough over and keep poking it while shaping it. Be patient. Keep poking and sprinkle it with a little flour as you turn it over. After about 5 minutes the dough should be a circle about 18 inches (unless you are using a small pizza pan. In that case, get the big pan out like I told you). Let it rise about 10 minutes.

My House Pizza

Ladle a layer of ground tomatoes on the crust except for the outer edge. Sprinkle evenly with garlic salt, oregano, cajun seasoning and black pepper. Add 2 cups of shredded parmesan, 1 cup of shredded cheddar and finally 3 cups of shredded mozzarella evenly. Sprinkle lightly with red pepper flakes. Bake until the cheese is nicely browned. After removing from the oven, pour some extra good olive oil over the top of the pizza. Let it stand at least 5 minutes before slicing.

I’m kind of tired now and don’t feel like picking out a wine for you to enjoy with this pizza. Just pick out any good Italian red and you’ll do fine.